Introduction
Anyone who’s built a React app of any appreciable complexity knows how challenging it can be selecting and configuring the multitude of libraries you’ll need to make it fast and performant. Gatsby, a static-site generator built with React and GraphQL, alleviates these pain points while also providing a straightforward way to consume data from an API. On the back-end, we can leverage Drupal’s content modeling, creation, and editing tools along with the JSON:API module to serve that content to our Gatsby front-end. Together, Gatsby and Drupal form a powerful combination that makes an excellent case for decoupling your next project.
What You’ll Build and Learn
In this article, we’ll take a hands-on look at using Drupal, the JSON:API module, and Gatsby to build a simple blog. We’ll create an index page listing all of our blog posts with a brief snippet of the article, and a page for each post with the full text. By the end, you should feel comfortable pulling JSON into a Gatsby site and displaying it on the page.
What Tools You’ll Be Using
- Drupal 8 - Drupal 8 will be used locally to model and manage our content. We’ll take advantage of the article content type that ships with the standard profile and the convenient admin interface for content creation.
- JSON:API - This Drupal 8 module will take care of exporting our content in well-formed JSON.
- Gatsby - We’ll use Gatsby to build our front-end and consume content from Drupal.
Prerequisites
- Familiarity with creating and navigating a fresh install of Drupal 8, including creating content and adding/enabling modules
- NPM and Node 10+ installed
- Basic understanding of React
Step 1: Drupal 8 + JSON:API
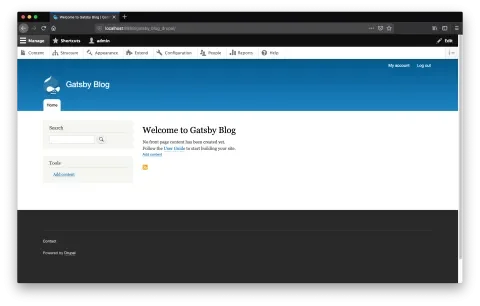
Let’s begin with a fresh install of Drupal 8.
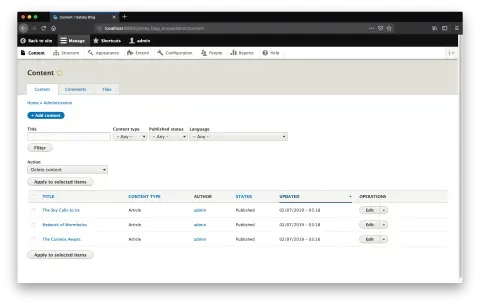
We’ll create three articles so we’ll have some stuff to work with.
Time to install the JSON:API module. Head over to https://www.drupal.org/project/jsonapi and copy a link to the module download. Once installed, enable both JSON:API and the Serialization modules and you’re done. We now automatically have endpoints created and available for our two content types. Let’s hit one via Postman to verify this using this URL:
http://localhost:8888/gatsbyblogdrupal/jsonapi/node/article
As the URL indicates, we’re accessing the JSON output for nodes of type article.

We can see a list of all the articles returned. If we wanted to retrieve a specific article, we just need to append the node id to the end of the URL:
http://localhost:8888/gatsbyblogdrupal/jsonapi/node/article/e2e62d88-7c5f-443d-9008-0dc5d79e1391
And with that, we’re ready to move on to Gatsby.
Step 2: Gatsby
From your command line, navigate to a directory where you’d like to create your application. From here, install the Gatsby CLI by typing npm install --global gatsby-cli. You can find more detailed installation instructions at https://www.gatsbyjs.com/ if you need them.
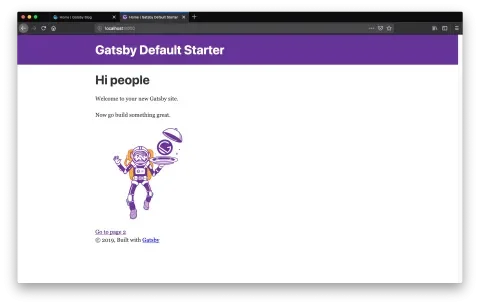
Run gatsby new gatsby_blog to create the app, change into the new directory that’s generated, then run gatsby develop to start the dev server. Hitting http://localhost:8000 shows you the starter page and confirms you’re up and running properly:
Let’s take a quick tour of Gatsby.
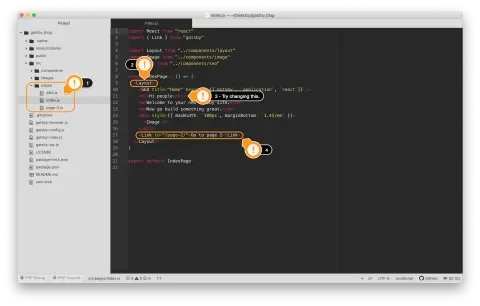
- Open your project directory in your editor of choice and navigate to
src/pages. You’ll see a file each for the index page (which you just saw above), an example of a second page, and a 404 page. - Taking a look at
index.js, you’ll see a<Layout>component wrapping some markup that you see on the index page. - Make a change to the
<h1>text here to see your site live reload. - Near the bottom, there’s a
<Link>component that points us to the second page.
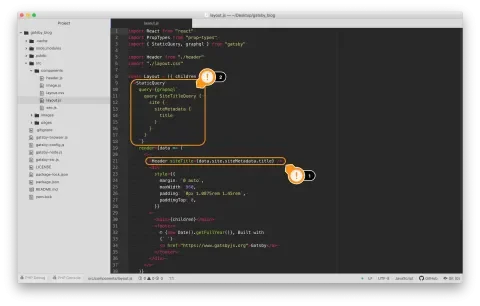
You may notice that the big purple header you see in the browser isn’t shown in the index file. That bit is part of the <Layout> component. Navigate to src/components and open layout.js.
- About midway down the page, you’ll see a
<Header>component with asiteTitleprop. It points todata.site.siteMetadata.title. - Just above that, you’ll see a
<StaticQuery>component, which appears to be doing something related to that site title. This is just a taste of how Gatsby makes use of GraphQL to manage app data. We’ll explore this more fully in the next section of this article. For now, take note that we’re accessingsiteMetadatato fetch the site’s title.
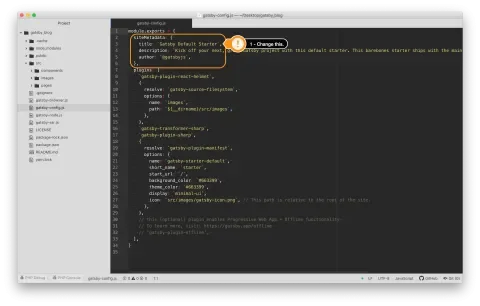
Head over to gatsby-config.js to see where siteMetadata is set.
- Right at the top of
gatsby-config.jswe can see a big JS object is being exported. The first property in this object issiteMetadata, and within that, we can see thetitleproperty. Change thetitleproperty to “My Gatsby Blog” and save. Your site will hot reload and that purple header’s text will change to match the config.
The plan is to have our index show the latest blog posts in reverse chronological order like a standard Drupal site would. We’ll show the post headline as a link, its image if it has one, and a short piece of the article. Clicking on the headline will take us to a full page view of the post. It will be a pretty barebones blog but should illustrate nicely how Gatsby and Drupal can work together.
Step 3: Gatsby with Real Data from Drupal
Gatsby uses GraphQL to pull in data from external sources and query for bits of it to use in your markup. Let’s take a look at how it works. When you ran gatsby develop earlier, you may have noticed a few lines that mention GraphQL:
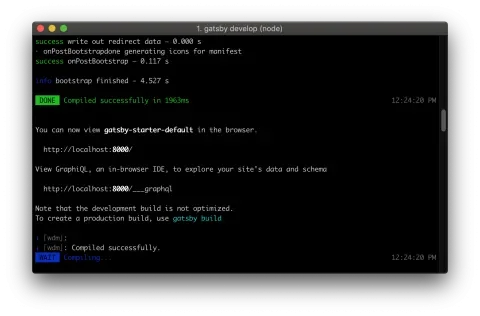
It says we can visit http://localhost:8000/_graphql to explore our site’s data and schema using the GraphiQL IDE. Let’s hit that URL and see what’s up.
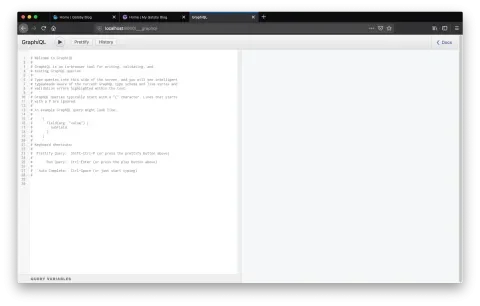
On the left-hand side, we can write queries that auto-complete and see the result of the query on the right-hand side. I like to come to this interface, experiment with queries, then copy and paste that query right into my app. To see how this works, we’ll write a query to fetch the site’s title.
- Start by typing an opening curly brace. This will automatically create the closing brace.
- From here, type
ctrl + spaceto bring up the auto-complete. This gives you a list of all the possible properties available to query. Typing anything will also bring up the auto-complete. - Type the word “site”, then another set of curly braces.
Ctrl + spaceagain will show the auto-complete with a much smaller list of options. Here you’ll seesiteMetadata. - Type
siteMetadata(or use auto-complete), followed by another set of curly braces. - Type
ctrl + spaceone more time to bring up the auto-complete, where we’ll seetitleas an option. - Type “title” and then
ctrl + enter(or the play button at the top) to run the query. On the right-hand side, we’ll see the result.
And there we have our site title. Take a look back to src/components/layout.js. You’ll see this exact query (with a little formatting) as the query prop of the <StaticQuery> component at the top. This is the approach we’ll use to build our queries when we start pulling in data from Drupal.
If you have any experience with React apps and pulling in data, any method to which you’re already accustomed will still work inside a Gatsby app (it’s still React, after all). You can use AJAX, the fetch API, async/await, or any third-party library you like. However, when working with Drupal (or a number of other common data sources), there’s a simpler approach: source plugins. Head over to https://www.gatsbyjs.com/ for details about this plugin, which is designed to automatically pull data from Drupal via JSON:API.
From within your project directory, run npm install --save gatsby-source-drupal. This will make the package available to use in our config. Open gatsby-config.js and notice the property called plugins. There’s already one plugin defined: gatsby-source-filesystem. This is what’s allowing the app to access local files via GraphQL, like that astronaut image we saw on the index page earlier. We’ll follow a similar pattern to add the Drupal source plugin just below this one:
{
  resolve: `gatsby-source-drupal`,
  options: {
    baseUrl: `http://localhost:8888/gatsby_blog_drupal/`,
  },
},
We’ve created a new object inside the plugins array with two properties: resolve and options. We set resolve to gatsby-source-drupal (note the back-ticks instead of quotes) and set the baseUrl option to the path of our Drupal site. Now, restart the Gatsby server. You should see something like this scroll by in the command line during server startup:
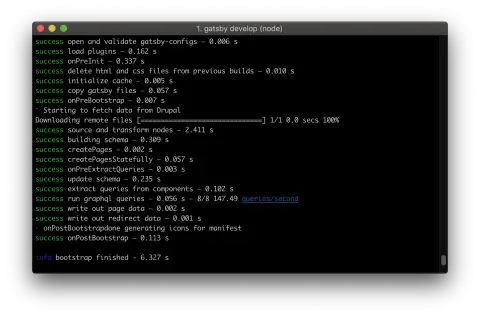
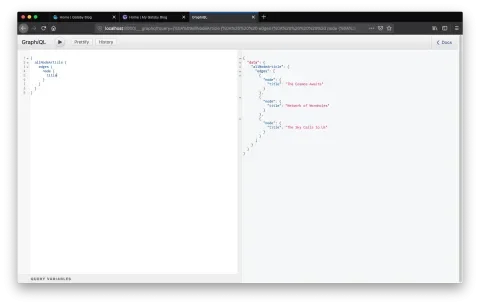
So, what’s happened? With the Drupal source plugin installed and configured, on startup Gatsby will fetch all the data available from Drupal, observe any GraphQL queries you’ve made inside your components, and apply the data. Pertinent to the site we’re building, it’ll make allNodeArticle available to query, which represents an array of all the article nodes on our site. Head back to your GraphiQL IDE (http://localhost:8000/_graphql) and check it out. Here’s what a query for the titles of all articles looks like:
Step 4: Querying Drupal from Gatsby
Now data from our Drupal site is available to our Gatsby app. We just need to insert some queries into our code. As of the release of Gatsby 2.0, there are two different ways of querying data with GraphQL. Let’s take a look at both options before deciding what’s best suited for our site.
Page Level Query
First is the page-level query. This method can only be used when the component represents a full page like our index.js, page-2.js, and 404.js files. For the page-level query, at the bottom of index.js, create a new variable called query that contains the full GraphQL query we looked at just a moment ago.
export const query = graphql`
  query {
    allNodeArticle {
      edges {
        node {
          title
        }
      }
    }
  }
`
Remember to import { graphql } from "gatsby" at the top of the file. Next, we need to make the data returned from this query available to our page component. Inside the parenthesis for our <IndexPage> component, add the data variable like so:
const IndexPage = ({ data }) => ( ...
The data variable is now available for use in our component. Note that we’re putting it between curly braces, which is ES6 shorthand for creating an object whose key is the same as the variable name. Let’s output the title of our first blog post just to confirm everything’s working. Add the following to the markup of the index page component:
<p>{ data.allNodeArticle.edges[0].node.title }</p>
You should see the title of the blog post added to the page of your running Gatsby site. Unpacking this a bit:
- reach into the data variable for the array containing all articles
- each item in this array is considered an “edge” — a term originating from Relay
- grab the first post at index 0
- access its node property
- and finally its title
You just utilized real data from Drupal in your Gatsby app!
If there’s a case where you have a smaller, non-page-level component into which you’d like to pull data, there’s another method for doing so, called Static Query.
Static Queries
A Static Query is a higher-order component that accepts two props: a query, and a render method. To accomplish the same outcome as our previous example, you’d wipe-out everything currently inside your index page component and replace it with this:
const IndexPage = () => (
  <StaticQuery
    query={graphql`
      query {
        allNodeArticle {
          edges {
            node {
              title
            }
          }
        }
      }
    `}
    render={data => (
      <Layout>
        <SEO title="Home" keywords={[`gatsby`, `application`, `react`]} />
        <p>{ data.allNodeArticle.edges[0].node.title }</p>
        <h1>Hi people</h1>
        <p>Welcome to your new Gatsby site.</p>
        <p>Now go build something great.</p>
        <div style={{ maxWidth: `300px`, marginBottom: `1.45rem` }}>
          <Image />
        </div>
        <Link to="/page-2/">Go to page 2</Link>
      </Layout>
    )}
  />
)
Remember to import { graphql, StaticQuery } from "gatsby" at the top of the file. Your page should reload automatically and show the same output as before. Using Static Query allows for more flexibility in how you pull in data. For the rest of this article, I’ll be using the first method since we only need to query data on the page level. Stay tuned to this page for details about the differences between the two options.
Step 5: Building Out Our Pages
Time to start putting our Drupal data to use for real. We’ll start with the index page, where we want our blog listing.
First, we need to update our page query to also pull in a few more things we’ll need, including the body of each blog post, its created date, and its image:
allNodeArticle {
  edges {
    node {
      title
      body {
        value
      }
      created
      relationships {
        field_image {
          localFile {
            childImageSharp {
              fluid(maxWidth: 400, quality: 100) {
                ...GatsbyImageSharpFluid
              }
            }
          }
        }
      }
    }
  }
},
Working with images in Gatsby is an article all its own. The high-level explanation of all that stuff up there is:
field_imageis filed underrelationships, along with things like tags- Gatsby processes all images referenced in your site files, creating multiple versions of them to ensure the best quality to file size ratio at various screen sizes, which means we’re querying for a local file
childImageSharpis the result of some image transformation plugins that come configured by default, it packages up all the various quality/size options mentioned abovefluidrepresents a srcset of images to accommodate various screen sizes, more details here…GatsbyImageSharpFluidis a query fragment, which comes from GraphQL world, more details here
Keep an eye on https://www.gatsbyjs.com/ for the latest documentation on using images in Gatsby. It’s a somewhat complicated subject, but if you play around in the GraphiQL IDE, you’ll find what you need. The end result is your images are transformed into various sizes to fit various breakpoints and are lazy-loaded with an attractive blur-up effect. As you’ll see below, we can use the <Img> component to insert these images into our page.
We’re now ready to map over all of our blog posts and spit out some markup:
{data.allNodeArticle.edges.map(edge => (
  <>
    <h3><Link to={ edge.node.id }>{ edge.node.title }</Link></h3>
    <small><em>{ Date(edge.node.created) }</em></small>
    <div style={{ maxWidth: `300px`, marginBottom: `1.45rem`, width: `100%` }}>
      <Img fluid={ edge.node.relationships.field_image.localFile.childImageSharp.fluid } />
    </div>
    <div dangerouslySetInnerHTML={{ __html: edge.node.body.value.split(' ').splice(0, 50).join(' ') + '...' }}></div>
  </>
))}
There’s a lot going on here, so let’s unpack it line by line:
- line 1: in typical React fashion, we map over the individual article nodes
- line 2: this is a React fragment, using shorthand syntax, it allows us to wrap several lines of markup without unnecessarily polluting it with wrapping divs
- lines 3 & 4: here we access some values on each node
- lines 5-7: here is our article image, wrapped in a div with CSS-in-JS styling to restrict overall width, then our
<Img>component as mentioned above, more details on styling in Gatsby here - line 8: JSON:API provides the body content of our article as a string of HTML, so we can use React’s
dangerouslySetInnerHTMLelement to convert the string to markup, preserving whatever formatting we included when creating our content
Additionally, I’ve converted the created date to a JavaScript Date object using the Date() function and manipulated the article body content to be truncated.
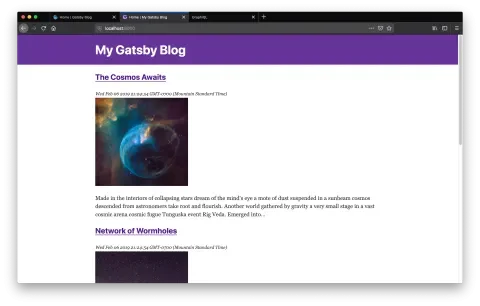
Nothing fancy, but it’s a good start. You may have noticed in the previous code snippet that our headline is linking to the article’s node id. Right now, that link is broken until we create pages for each node. Thankfully we don’t have to do this manually. Let’s take a look at how we can generate some pages automatically for each of our posts.
Head on over to gatsby-node.js and add the following:
exports.createPages = ({ graphql, actions }) => {
  return graphql(`
    {
     allNodeArticle {
       edges {
         node {
           id
         }
       }
     }
    }
  `
  ).then(result => {
   console.log(JSON.stringify(result, null, 4))
  })
}
Here we’re writing our own implementation of the createPages API. Gatsby will use this to generate pages for each node id. Stop and restart the development server to see the following output in your console:
"data": {
    "allNodeArticle": {
        "edges": [
            {
                "node": {
                    "id": "e2e62d88-7c5f-443d-9008-0dc5d79e1391"
                }
            },
            {
                "node": {
                    "id": "1058ebcb-c910-4127-a496-b808740e49a5"
                }
            },
            {
                "node": {
                    "id": "29326c97-c2bc-4161-bcd7-f1c4564343f2"
                }
            }
        ]
    }
}
Next, we’ll need a template for our posts. Create a file called src/templates/blog-post.js and paste in the following:
import React from "react"
import { graphql } from "gatsby"
import Layout from "../components/layout"
import Img from 'gatsby-image'

export default ({ data }) => {
  const post = data.nodeArticle
  return (
    <Layout>
      <div>
        <h1>{ post.title }</h1>
        <small><em>{ Date(post.created) }</em></small>
        <div style={{ maxWidth: `900px`, marginBottom: `1.45rem`, width: `100%` }}>
          <Img fluid={ post.relationships.field_image.localFile.childImageSharp.fluid } />
        </div>
        <div dangerouslySetInnerHTML={{ __html: post.body.value }}></div>
      </div>
    </Layout>
  )
}

export const query = graphql`
  query($id: String!) {
    nodeArticle(id: { eq: $id }) {
      title
      body {
        value
      }
      created
      relationships {
        field_image {
          localFile {
            childImageSharp {
              fluid(maxWidth: 400, quality: 100) {
                ...GatsbyImageSharpFluid
              }
            }
          }
        }
      }
    }
  }
`
Notice that we’re querying for a single article node now, passing in an id as an argument. Otherwise, it looks a lot like our index page. You’ll see how this template gets access to that id variable in the next snippet. With a template in place, we can update gatsby-node.js to use it when generating pages:
const path = require(`path`)

exports.createPages = ({ graphql, actions }) => {
  const { createPage } = actions
  return graphql(`
    {
     allNodeArticle {
       edges {
         node {
           id
         }
       }
     }
    }
  `
  ).then(result => {
    result.data.allNodeArticle.edges.forEach(({ node }) => {
      createPage({
        path: node.id,
        component: path.resolve(`./src/templates/blog-post.js`),
        context: {
          id: node.id,
        },
      })
    })
  })
}
We’re now passing each node’s id as a context variable to our template, which enables us to query that specific node and access its fields. Now the headline links in our index will link to a full page view of the post. Give it a try:
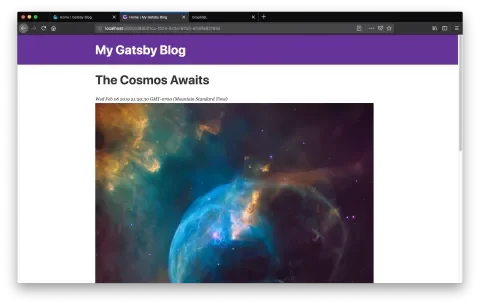
There’s plenty left we could do to enhance the site, like adding some of our own styling finding a friendlier date format, adding alt text to images, using slugs in place of ids in URLs, etc. But as of now, we have a functioning blog powered by data directly from Drupal. The best part is, we don’t have to worry at all about setting up a server, installing Drupal, and managing that whole side of things.
Step 6: Creating A Build and Deploying to GitHub Pages
In this final step, we’re ready to generate a build of the site we’ve developed and deployed it for free to GitHub Pages. Additionally, we’ll look at how we can streamline the process so updating our deployed site when new content is added is fast and easy.
We’ll start with a couple more Gatsby commands:
gatsby build- this creates a build of your site, complete with static files inside the public directorygatsby serve- this allows you to preview your built site at http://localhost:9000/
If you haven’t yet, run git init in your project directory to initialize a new repo. To make deployment to GitHub Pages a snap, we’ll take advantage of a handy package called gh-pages. Run npm install --save-dev gh-pages to install, then we’ll add a script to our package.json file:
"scripts": {
  ...,
  "deploy": "gatsby build --prefix-paths && gh-pages -d public"
},
The site will be located inside a directory named for your repo. That --prefix-paths bit allows us to drill down into this directory. We just need to include the proper prefix path in our gatsby-config.js:
module.exports = {
  ...
  pathPrefix: "/gatsby_blog",
}
Head on over to GitHub and create yourself a new repository called gatsby_blog. Back on your command line, run git remote add origin http://github.com/username/gatsby_blog.git, substituting your own GitHub username.
Once that’s done, run npm run deploy and wait for the build and deploy to complete. If everything went correctly, you should be able to visit your live blog at http://username.github.io/gatsby_blog/. Congrats!
When you need to update your site’s content, simply run your deployment script again.
Conclusion
React is a powerful and flexible library for building dynamic websites, but it’s often only one of many libraries you’ll end up using to reach your goal. Gatsby gathers up everything you’ll likely need and handles all the tricky wiring for you, vastly improving the speed and quality of your site as well as the overall developer experience. Pairing it with Drupal’s excellent content management tools and the zero-config JSON:API module makes many aspects of decoupling your site much easier. This hybrid approach may be just what you need for your next project.
Further Reading
- Official Gatsby tutorial: https://www.gatsbyjs.com/
- Gatsby Guides by Osio Labs: https://gatsbyguides.com/
- Gatsby-Source-Drupal Deep Dive: https://www.bounteous.com/insights/2018/08/17/understanding-limitations-gatsby-source-drupal/