React is a JavaScript presentation library created by Facebook and used at AirBnB, Instagram, NetFlix, and PayPal, among others. It is structured in components, where each component is a class that contains everything it needs for its rendering. React is also isomorphic, meaning that its code can be executed by the server and the browser.
This article gives an overview of how our contact form works. In order to explain it, we have created a GitHub repository and a live example which renders the form and processes the submission. For clarity, we have skipped some aspects of real applications such as a routing system, client and server side form validation, and email submission.
React is not a framework. Therefore, we need a few extra technologies to power the form. Here is a description of each of them:
- Express: a Node.js web application manager. It listens to requests for our application and returns a response.
- JADE: a templating engine widely used within the Node.js community. It is used to render the main HTML of the application.
- Grunt: a JavaScript task manager. We use it to run two tasks: transform React's JSX syntax into JavaScript through Babel and then package these files into a single JavaScript file through Browserify.
In the following sections we will open the form, fill it out, submit it and view the response. During this process, we will explain what happens in the browser and in the server on each interaction.
Bootstrapping and rendering the form
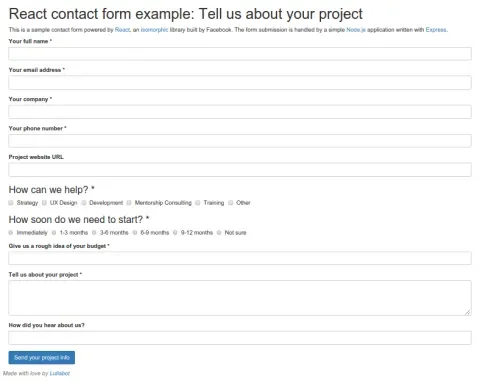
We start by opening the form located at https://react-form.herokuapp.com with a web browser. Here is the response:
And here is what happened in the web server in order to render the response:
1. Our Express application received a request and found a match at the following rule:
// Returns the contact form.
app.get('/', function (req, res) {
 var ContactForm = React.renderToString(ContactFormFactory());
 res.render('index', { Content: ContactForm });
});
2. The rule above rendered the ContactForm component into a variable and passed it to the index.jade template, which has the following contents:
html
  head
    title!= React form example | Lullabot
    script(src='/js/react.js')
    link(href='https://some-path/bootstrap.min.css', rel='stylesheet')
  body.container
    #container.container!= Content
    script(src='/build/bundle.js')
3. Express injected the form into the Content variable at the above template and then returned a complete HTML page back to the browser. At this point, we saw the form in the web browser.
4. The web browser completed receiving /build/bundle.js and executed the following code contained there:
var React = require('react');
var ContactForm = require('./contact-form.jsx');
React.render(<ContactForm />, document.getElementById('container'));
The above snippet loaded the ContactForm component and rendered it. We already did this server side but we need to do it again client side in order to attach listeners to DOM events such as the form submission. This is the reason why React is isomorphic: it's code can be processed client side and server side, which solves the blank screen effect of Single Page Applications. In this example, at step 3 we received the whole form from the server instead of a blank screen. Isn't React neat?
Filling out the form and submitting it
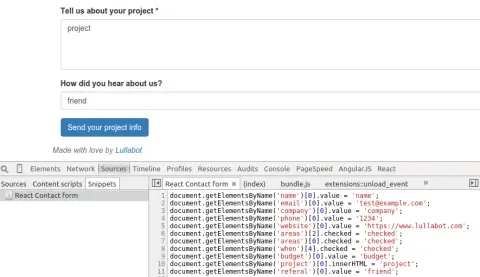
We will use this snippet to fill out the form. Here is a screenshot of us running it in Chrome's Developer Tools:
Next, we will submit the form by clicking on the button at the bottom of the page. This will call a method in the ContactForm React component, which listens to the form submission event through the following code:
<form action="" onSubmit={this.handleSubmit}>If you worked on web development a few years ago, then the above syntax may seem familiar. The old way of attaching handlers to DOM events was via HTML event attributes. This was straightforward but it had disadvantages such as polluting the HTML with JavaScript. Later on, Unobtrusive JavaScript became the standard so websites would separate HTML from JavaScript by attaching event listeners through jQuery.bind(). However, on large web applications it became difficult to find which callbacks were listening to a particular piece of HTML. React joins the best of both strategies because a) it lets us write event handlers in HTML event attributes and b) when the JSX code is transformed to JavaScript, it is taken out of the HTML and moved to a single event listener. React's approach is clear for developers and efficient for the web browser.
Updating the component's status
When we click on the submit button, the form will first show a Sending message and then, once we receive a response from the web server, it will update the message accordingly. We achieve this in React by chaining statuses. The following method makes the first state change:
handleSubmit: function (event) {
  event.preventDefault();
  document.getElementById('heading').scrollIntoView();
  this.setState({ type: 'info', message: 'Sending...' }, this.sendFormData);
},
In React, the method this.setState() renders a component with new properties. Therefore, the following code in the render() method of the ContactForm component will behave differently than the first time we called it at the beginning of the article:
render: function() {
  if (this.state.type && this.state.message) {
    var classString = 'alert alert-' + this.state.type;
    var status = <div id="status" className={classString} ref="status">
                   {this.state.message}
                 </div>;
  }
  return (
    <div>
      <h1 id="heading">React contact form example: Tell us about your project</h1>
      {status}
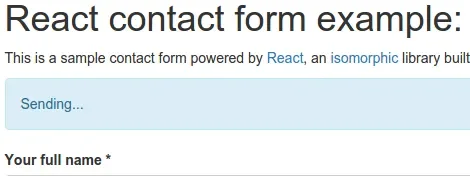
When we rendered the form on server side, we did not set any state properties so React did not show a status message at the top of the form. Now we have, so React prints the following message:
Sending the form data and rendering a response
As soon as React shows the above Sending message on screen, it will call the method that will send the form data to the server: this.sendFormData(). We defined this transition in the following code:
this.setState({ type: 'info', message: 'Sending...' }, this.sendFormData);This is how you chain statuses in React. In order to show a Sending status and then submit the form data, we provide an array with new properties for the render() method, and a callback to be executed once it finishes rendering. Here is a simplified version of the callback that sends the form data to the web server:
sendFormData: function () {
  // Fetch form values.
  var formData = {
    budget: React.findDOMNode(this.refs.budget).value,
    company: React.findDOMNode(this.refs.company).value,
    email: React.findDOMNode(this.refs.email).value
  };

  // Send the form data.
  var xmlhttp = new XMLHttpRequest();
  var _this = this;
  xmlhttp.onreadystatechange = function() {
    if (xmlhttp.readyState === 4) {
      var response = JSON.parse(xmlhttp.responseText);
      if (xmlhttp.status === 200 && response.status === 'OK') {
        _this.setState({ type: 'success', message: 'We have received your message and will get in touch shortly. Thanks!' });
      }
      else {
        _this.setState({ type: 'danger', message: 'Sorry, there has been an error. Please try again later or send us an email at info@example.com.' });
      }
    }
  };
  xmlhttp.open('POST', 'send', true);
  xmlhttp.setRequestHeader('Content-type', 'application/x-www-form-urlencoded');
  xmlhttp.send(this.requestBuildQueryString(formData));
},
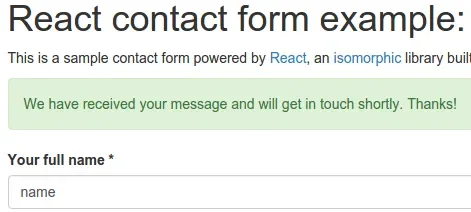
The abobe code fetches the form values and then submits them. Depending on the response data, it shows a success or failure message by updating the component's state through this.setState(). Here is what we see on the web browser:
You may be surprised that we did not use jQuery to make the request. We don't need it. The native XMLHttpRequest object is available in the set of browsers that we support at Lullabot.com and has everything that we need to make requests client side.
The following code in the Express application handles the form submission by returning a successful response:
// Processes the form submission.
app.post('/send', function (req, res) {
  return res.send({status: 'OK'});
});
In the real contact form we grab the form data and send an email. If you are curious about how this works, you can find an example snippet at the repository.
Conclusion
Clarity and simplicity are the adjectives that come to mind when we think of React. Our ContactForm component has a few custom methods and relies on some of React's API methods to render and process the form. The key to React is that every time that we want to provide feedback to the user, we set the state of the component with new values, which causes the component (and the components within) to render again.
React's solves some of the challenges that we have experienced in front end web applications when working with other technologies. The ability to render the result of the first request on the server is mindblowing. We also like its declarative syntax, which makes it easy for new team members to understand a given component. Finally, its efficient event system saves us from attaching too many event listeners in a page.
Did this article spark your curiosity? Go and try the live example and fork the repository if you want to dive deeper into it. At Lullabot, we are very excited about React and are looking forward to your feedback.


