Using several terminal tabs is a common way to work so you can switch between different tasks. When you aren’t developing with containers, this is fine. You can switch and keep one tab open for the logs. But many developers have found that they miss things and so move some tabs to a secondary monitor.
However, with containers, there are more places you need to look. When your tabs number three or more, it starts to get cumbersome. But there are ways to see more on a single screen.
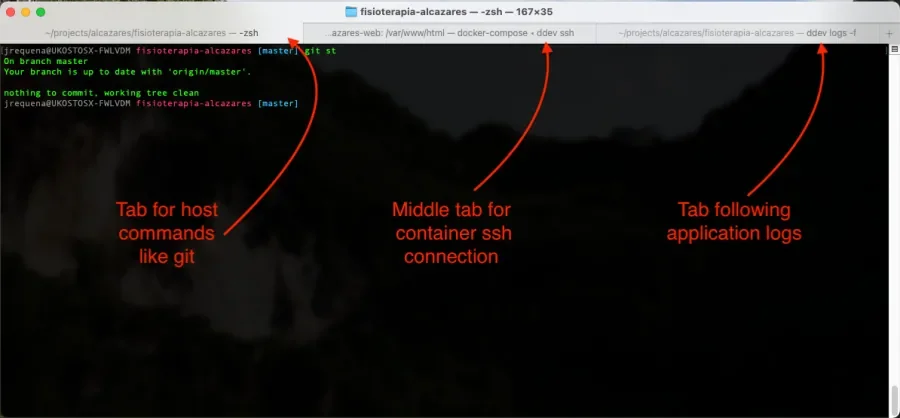
Using two or three terminal tabs, using keyboard shortcuts to jump between them.
Two windows side by side
Ubuntu has a nice set of keyboard shortcuts to manage multiple applications side by side. But what if you are working on a Mac? For this article, we’ll be referencing MacOS BigSur 11.7.
This is the built-in split-screen experience in MacOS:

This is a side by side split screen in MacOS.
But there are issues with this setup.
Tedious to set up
To start a split screen session, you need to hover over a top left icon, wait for a couple of seconds, and then you will see the Tile window to Left of Screen option, and then you select the second window so it will be placed on the right. This is tedious as there is no keyboard shortcut for this.
Just two windows side by side
Per this support answer, you can just have two windows unless you start playing with screen resolution tricks.
The setup would be different in Linux
If you ever want to use Linux, you have to learn an entirely different approach to managing multiple views. If you switch back and forth, this problem becomes more annoying.
There is paid software like SizeUp to accomplish what we are looking for. But is there a way we can manage this on our own?
If you search for “how can I manage multiple terminal windows,” you will eventually run into the term terminal multiplexer. Based on the description on Wikipedia, these do even more than we need.
https://en.wikipedia.org/wiki/Terminal_multiplexer
A terminal multiplexer is a software application that can be used to multiplex several separate pseudoterminal-based login sessions inside a single terminal display, terminal emulator window, PC/workstation system console, or remote login session, or to detach and reattach sessions from a terminal. It is useful for dealing with multiple programs from a command line interface, and for separating programs from the session of the Unix shell that started the program, particularly so a remote process continues running even when the user is disconnected.
There are many options available, but here are our criteria:
- To be able to manage different panes on the same screen via keyboard shortcuts.
- To use it in macOS and Linux with almost zero setup.
- Free and open source.
GNU Screen and tmux meet the above criteria and are popular, well-tested open-source projects. We will use tmux because it’s available everywhere (local Mac, Linux containers, remote servers, and more), deals well with ssh sessions, and allows us to navigate and select text from the buffer using vim keyboard shortcuts. It’s also very customizable.
tmux basics
For Mac, the easiest way to install tmux is with Homebrew.
brew install tmuxtmux is built into most Linux distributions, so there is no installation required.
To start using tmux, run tmux in the terminal. Once you have done that, you will see that a green bar appears at the bottom. This bar contains the session name, which defaults to the number 0. Sessions let you keep different sets of panes, useful when you want to work on two projects at the same time or when you want to switch between multiple remote SSH sessions.
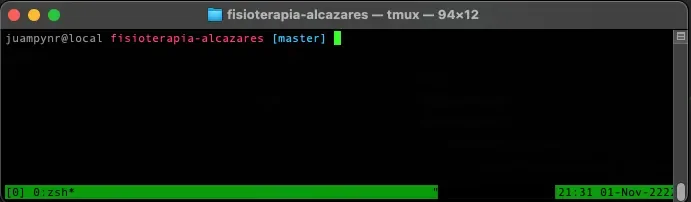
tmux adds a status bar at the bottom to keep track of the current session.
Now we can start splitting the terminal into different panes. Let’s make a left pane for logs and then two panes on the right for interacting with the host and with a container. Something like this:
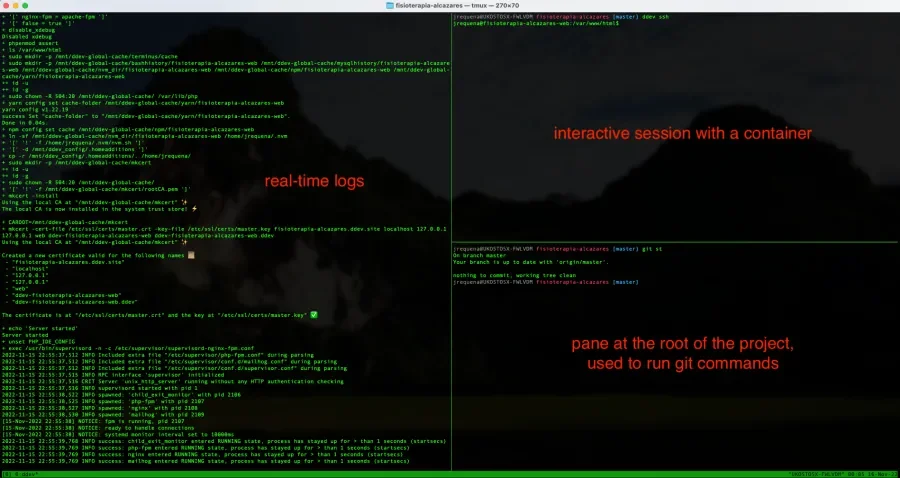
A typical layout when working on a project with tmux.
Splitting the terminal into vertical and horizontal panes is achieved by the following keyboard shortcuts:
Ctrl + b + %to split the current pane vertically.Ctrl + b + "to split the current pane horizontally.Ctrl + b + xto close the current pane.
If you need a quick guide to the keyboard shortcuts, look at the tmux cheat sheet.
Customizing tmux
You can create your own keyboard mappings. The default method to move between panes is Ctrl + b + o, which iterates over panes, which is not efficient when you want to move back and forth between two panes. Let’s add the ability to move between panes VIM-style. Create a ~/.tmux.conf file and add the following lines:
bind -r k select-pane -U
bind -r j select-pane -D
bind -r h select-pane -L
bind -r l select-pane -R
The above changes won’t work automatically. After creating or changing ~/.tmux.conf, you can reload the configuration via Ctrl + b + : and then typing source-file ~/.tmux.conf. Alternatively, you can close the terminal and start a new tmux session.
The above keyboard mappings are great because you can jump between panes in all four directions using Ctrl + b + any of the h, j, k, l keys, as if you were using the VIM editor.
You can even change the default key prefix to run commands, Ctrl + b. At ~/.tmux.conf, add the following line:
set -g prefix C-sThis will change the global command prefix to Ctrl + s.
Scrolling, Copying, and pasting
With the above setup, you can’t scroll using the Page Up and Page Down keys. Nor can you scroll with the mouse. You need to use tmux’s Copy Mode. Here are the basics:
- To scroll back at the current pane, press
Ctrl + b + [. Then you can scroll up and down that pane output as with a regular terminal. To quit this mode, press theEsckey. - As for copying and pasting, you can’t just use the mouse to select text when there is a vertical split because you would also select text from other panes. See below:

Copying text from a pane is different when there is vertical splitting.
There are keyboard shortcuts to copy and paste from a particular pane. However, you can also do this by zooming in the pane with Ctrl + b + z, scrolling, selecting, and copying text, and then zooming it back with Ctrl + b + z to return and paste it. Here is a short clip to illustrate it:
Session management
At any time, you can detach from the current session with Ctrl + b + d and return via tmux. This feature opens a plethora of interactions that System Administrators love since you can start a session, connect to a remote machine and start a long process:
tmux
ssh some@machine
./run-some-process
Then, press Ctrl + b + d to detach from that session and do some other work. Once you want to check back in, type tmux and you will be back at the process’s output.
There is even a better approach than the above one that allows even closing tmux, and the remote process will still run. Assuming that the remote machine has tmux, we could:
- Connect to it:
ssh some@machine. - Start a named tmux session:
tmux new -s some-name. - Execute a long process:
./run-some-process. - Detach and close the SSH session:
Ctrl + b + dand thenexit. - The next day, connect to the machine and check the status of the process:
ssh some@machineand thentmux attach -t some-name.
Next steps
The above commands should get you started with tmux. We haven’t covered managing more than one window, but that can be useful as well. If you want to dig deeper into tmux’s feature set, take a look at the repository’s wiki at https://github.com/tmux/tmux/wiki/Getting-Started.