One of Drupal's biggest strengths is the ability to define structured content, then display and edit it in a variety of ways without duplicating development or design work. "Display Modes" have always been a big part of that power. One piece of content can be displayed as a Teaser, as a Full Page, as a Search Result, and so on — each with its own markup and field presentation.
Customizing the list of Display modes has always been possible in Drupal, but since Drupal 8, it's become easier. And the same flexibility has been extended to the edit forms that let site users create and modify content. A "Simple" Form Mode, for example, might hide complex optional fields to streamline the editing experience for new users or less privileged user roles.
Adding custom display modes
To create a new display mode (or customize one of the "stock" ones that come pre-installed), log in to your site as an administrator and navigate to the admin/structure/display-modes page. There, you can select either View modes or Form modes.
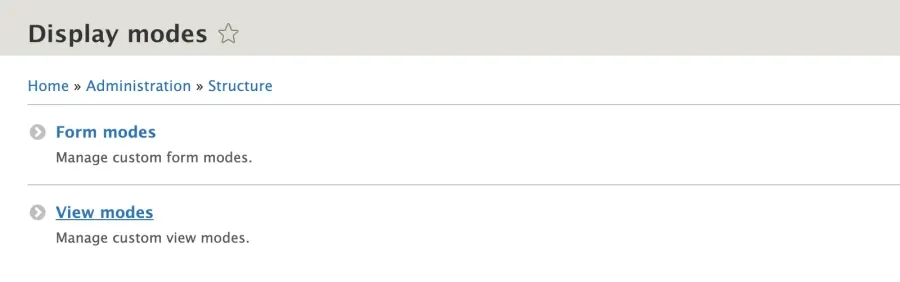
/admin/structure/display-modes
Every entity type on the site (content nodes, user accounts, taxonomy terms, etc.) can have its own list of custom display modes. Once you've created one, go to the Manage Display page for any content type. For new Drupal sites, /admin/structure/types/manage/[bundle-name]/display is usually a good bet.
We have a music demo site with the following content types: album, artist, and track. When viewing an album page, we only want the image and name of the artist to show up. However, when an album is viewed in a listing like search results, we only want the name of the artist to show up. To accomplish this, we are going to add a view mode named Artist Image Card. To start with, we visit /admin/structure/display-modes/view and create a content view mode giving it our chosen name.
Now we need to enable the new Artist Image Card display mode on the artist content type by going to /admin/structure/types/manage/artist/display and toggling Custom Display Settings.
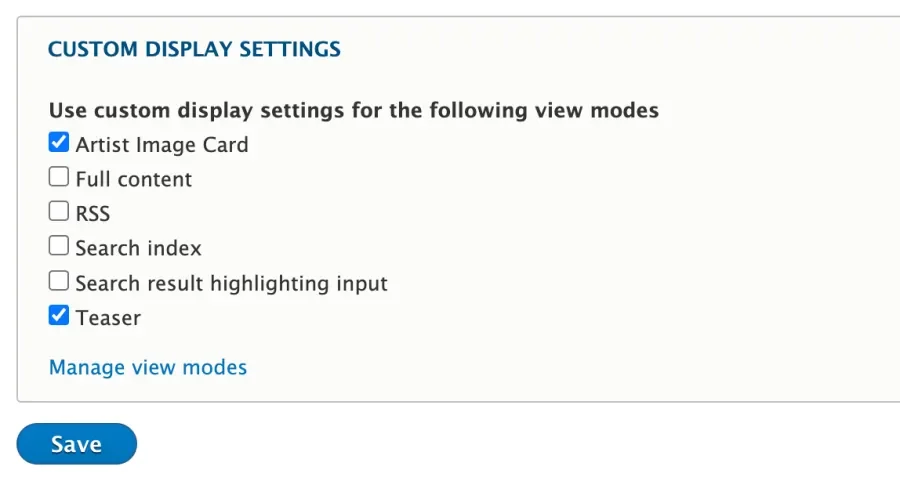
This will activate the display mode for custom treatment. After checking the Artist Image Card view mode and saving, we can see it as an option in the list at the top of the page. After selecting the Artist Image Card, you can reorder, hide, and change the format of each field for that display mode.
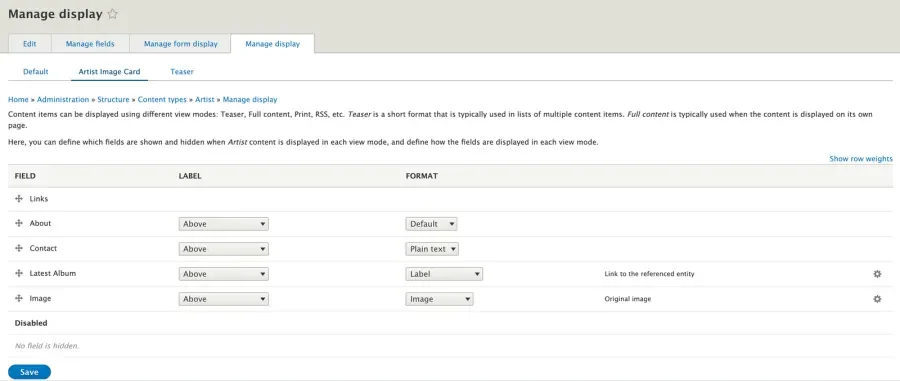
Display settings for the Artist Image Card view mode
While we are focused on display modes for content types, you can also do the same thing for taxonomy terms, media, users, and comments.
Using your new modes
There are two easy ways to make use of your new display modes. Whenever a piece of content is included in an Entity Reference field, you can choose to display it as a link or as a fully-rendered entity in the display mode of your choice. Creating a unique display mode for these "embedded" views makes it easier to control how content appears when it's included inside another entity without clobbering its normal display.
For the music demo site, an album references an artist using an Entity Reference field, so let's ensure it renders the artist with our new Artist Image Card view mode. First, we disable all fields except the Image field in the Artist Image Card view mode on the artist content type. We also set the image style and link the image back to the artist page that owns the image.
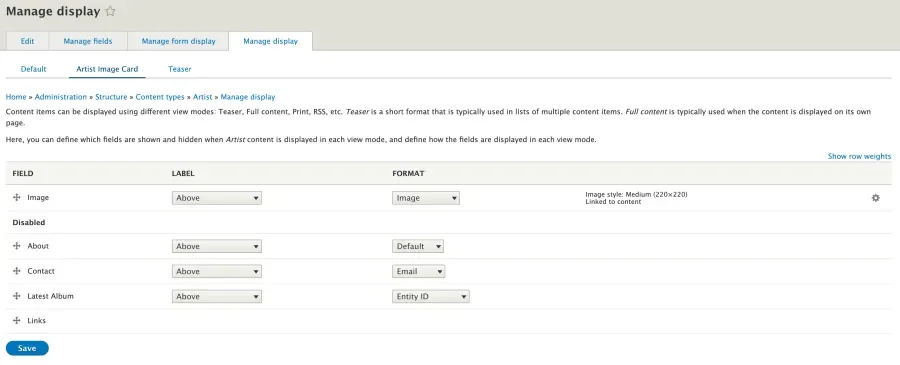
All fields hidden except for the Image field
Next, we go to the album Manage Display settings. We have enabled the Full content mode to have custom settings because we want to be explicit about what we are changing and for what context. We set the Artist field format to "Rendered entity" and then use the Artist Image Card view mode, as shown below.
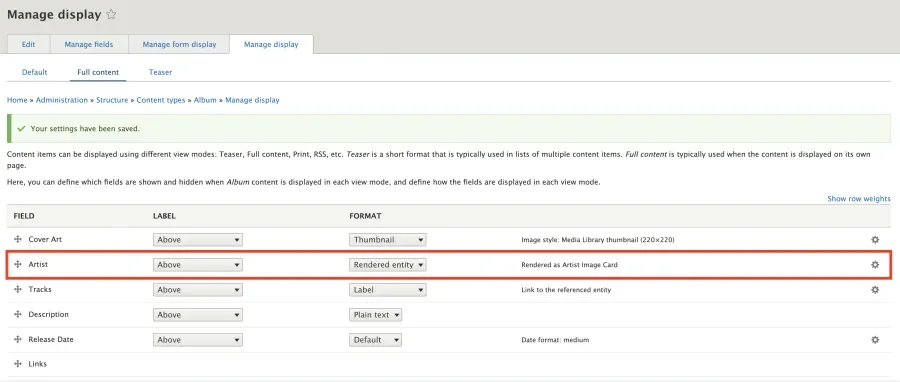
Setting the Artist field to render as the Artist Image Card display mode
Now, whenever we view an album's page, it will render its referenced artist entity using the Artist Image Card view mode.
If you want more control over the rendered content, Drupal creates template suggestions for nodes based on display mode names. If we need to add special CSS classes or additional formatting to our Artist Image Card, we can create a template called node--artist-image-card.html.twig or, to get more granular, node--artist--artist-image-card.html.twig. Create the template in your theme, rebuild the theme registry by clearing the cache, and Drupal will pull from this template whenever it renders that view mode. It helps to copy over the code from node.html.twig to have a starting block.
Drupal also creates these template suggestions for media items. If you want template suggestions for other entities, like taxonomy terms, you can implement hook_theme_suggestions_HOOK() in your themes or modules. Use node_theme_suggestions_node() as an example to start with.
The same approach can be used when building Views. Any display mode can be used when spitting out the contents of a View. This makes it easy to use, for example, a unique Slideshow Card display mode when building a rotating gallery view. Here's an example of a View using our new view mode for artists. This way, when the output of a View needs to change, you don't have to modify the View, only the view mode.
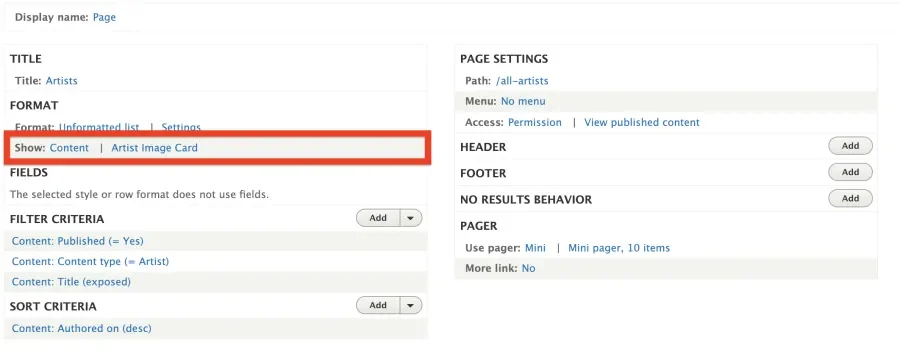
You probably wouldn't want to use the Artist Image Card view mode in a listing View, however, so this would be an excellent opportunity to create another view mode for this purpose, named appropriately.
The View Mode Page module for Drupal gives some extra flexibility by adding URLs, like node/1/details, that show an entity's custom view modes. You're still responsible for adding links to those new URLs in your design, but it makes sure that they respect any Pathauto patterns and SEO-friendly URLs you've created. This is useful if you have one field with a lot of content that might deserve its own page.
But what about forms?
Although defining custom form display modes follows much the same pattern (see any content type's Manage Form Display page at /admin/structure/types/manage/[bundle-name]/form-display), actually using custom form displays requires some contrib modules.
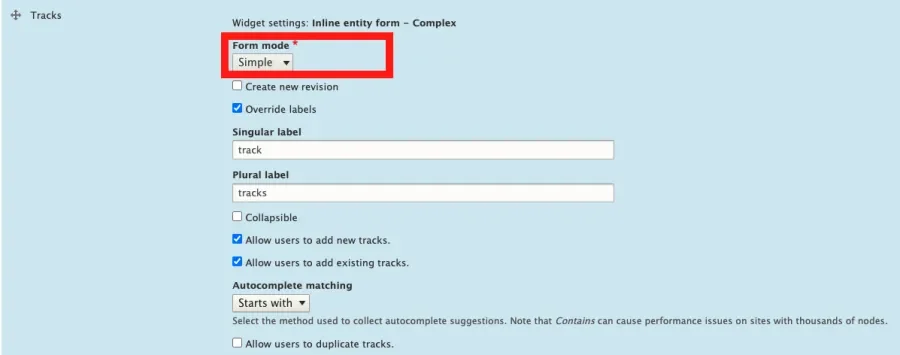
Using modules like Inline Entity Form or Entity Browser allows you to configure an embedded entity form to use a certain form mode. In certain contexts, you can show a more limited number of fields. This is the most straightforward use of form modes.
In the form configuration for the Album content type, the Tracks field is set up to use Inline Entity Form, and you can see where the form mode has been set to use Simple.
And in an Entity Browser set up for adding new artists, you can see the form mode used is Default. This allows Drupal sites to simplify content creation forms depending on the context and workflow.

There are some other contrib modules you can look at, and Form Mode Manager is the simplest: it lets you set up a custom editing page for each distinct mode and adds a tab to switch between modes on the content editing form itself. If you're using form display modes as optional alternatives to the standard edit form, it's your best bet. View a demo of this module.
Form Mode Control takes a slightly different approach. It lets you assign custom form displays to individual user roles, giving editors more flexibility without complicated access control tools. As with Form Mode Manager, modes can also be requested manually by adding a querystring to the node editing URL, like: mysite.com/node/add?display=simple.
There are, of course, ways to use your custom form modes in custom code.
Integrating display modes into the design process
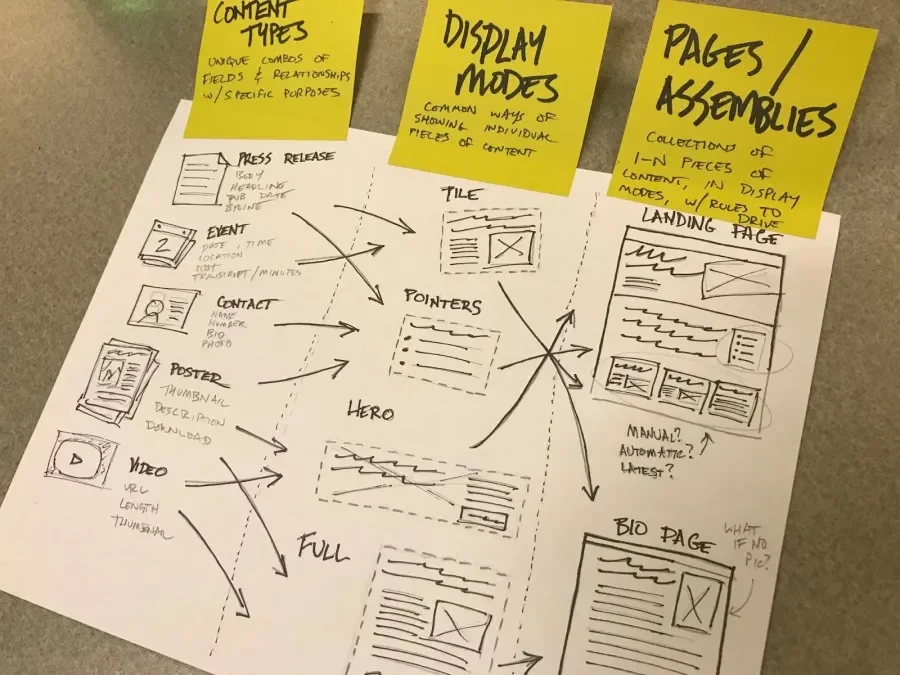
Display modes provide a great opportunity to tie code to design documents and entrench a ubiquitous language. If your content or marketing team calls a particular look and arrangement of data an Article Image Card, for example, guess what you should name your display mode? Yes, you should probably name it Article Image Card. Content strategists and architects will pick up on this usage during the discovery phase and use it in the site planning. Using a shared vocabulary from the beginning of the project helps project managers, designers, and developers to learn the same language as stakeholders, which helps improve communication.
This becomes more useful if you have a component library, and groups of components can be mapped to a display mode. Everyone has a better chance of knowing what everyone else is talking about. This has a greater chance of success when the front-end development team works closely with the design team to establish these connections. Our own collaborative teams of designers and developers often work in tandem to name components, establish where and how they are used and go so far as to annotate designs with information about component names, reuse, and any other display details. This process strengthens the overall design system and ensures consistency.
Let's say we have several mockups of a Case Study content type. This content type needs to be displayed in different contexts, and a designer presents a work in progress, as shown below. Keep in mind that this is a simplified example.
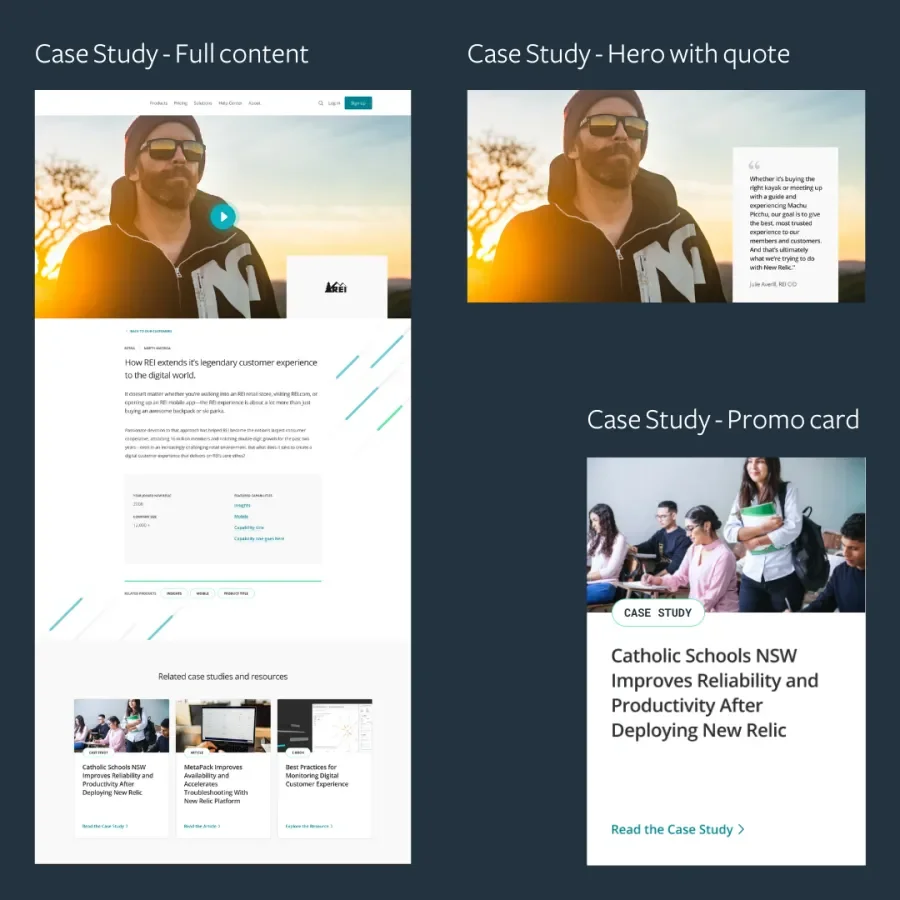
In this example, it would be a good idea to enable the Full content view mode for the Case Study content type and use that for the main content. We would then want to create two other view modes for the content type: Hero with quote and Promo card.
We would then enable those view modes with Custom Display Settings and hide all fields that are now shown. We'll probably create some custom templates for each of these as well.
Now, when the design team says something like, "We made some changes to the hero with quote on our case studies," developers will know exactly what is being talked about, and they will know where they need to go to implement the changes. Designers can also say things like, "At the bottom of the case study, we need three promo cards displayed," and it should make sense to the entire development team. Likewise, a developer can come to the design team and say, "We're having some problems implementing the image on the promo card design for case studies." Designers will immediately be on the same wavelength.
Imagine the possible confusion (and time wasted) if the view mode had been named something like Short Blurb. Or worse, if it had been named something like Display Mode Three.
Navigate the risk of having a gazillion display modes
One risk of using display modes in the way we have been describing: having the number of them balloon out of control, making site maintenance and design implementation more difficult. We have seen some installs where a single content type has four different types of Promo card modes because each has a slightly different field configuration. While that can be justified, know that each one adds more complexity. This is another reason to collaborate closely through the entire development process.
Strategists, designers, and developers working together can help identify the necessary number of variations based on requirements. The group can come to a consensus, for example, that it is sufficient to use a single Promo card mode for both the homepage and the "Related content" section at the bottom of an article. You didn't need two different styles, after all. In some cases, maybe you do need those extras. What's important is collaborating and talking things through to land on the best solution.
Finding the correct number of display modes for your system helps provide enough visual variation and content interest while simultaneously keeping the structural and technical implementation of the site manageable and sustainable for site admins and developers who may need to make adjustments or changes in the future.
Conclusion
Like many other parts of Drupal, display modes offer a lot of flexibility, which means they require a little more discipline and planning to use them to their full potential. We think taking the time to do this can be worth it. Using them properly can provide benefits throughout your entire development stack. They could even help streamline communication between stakeholders, content editors, and the development team.
That's a lot of potential value for what seems like simple functionality.