Embedding media assets (images, videos, related content, etc) in a WYSIWYG text area is a long-standing need that has been challenging in Drupal sites for a while. In Drupal 7, numerous solutions addressed the problem with different (and sometimes competing) approaches.
Drupal 8 core comes with basic support for embedding images out-of-the-box, but we all know that “ambitious digital experiences” nowadays need to go far beyond that and provide editors with a powerful tool capable of handling any type of media asset, including remote ones such as a relevant Tweet or Facebook post.
This is where the powerful combination of Entity Embed + URL Embed comes into play. Predicated on, and extending the foundation established by Drupal core, these two modules were designed to be a standardized solution for embedding any entity or remote URL content in a WYSIWYG editor in Drupal 8.
In this article, you will find:
- What Drupal 8 core offers out-of-the-box for embedding images inside rich text
- How to create a WYSIWYG embed button with the Entity Embed module (with some common pitfalls you may encounter along the way)
- How to embed remote media assets with the URL Embed module (again, with some common pitfalls!)
- Additional resources on how to extend and integrate your embedding solutions with other tools from the Media ecosystem.
Drupal 8 core embedding
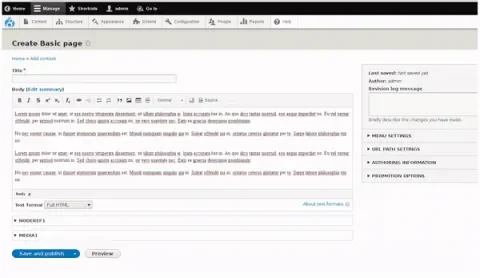
Drupal 8 has made a big step from Drupal 7 and included the CKEditor WYSIWYG library in core. It also comes with an easy-to-use tool to embed local images in your text.
But what if the content you want to embed is not an image?
I am sure you have come across something like this before:
or this:
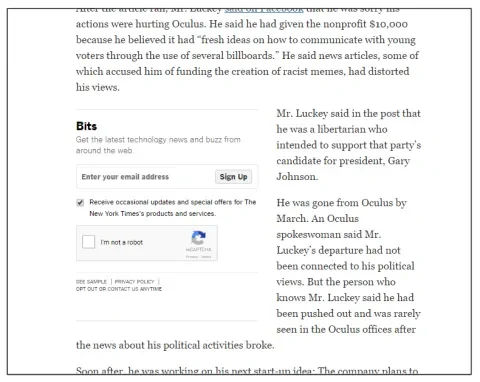
These are all examples of non-image media assets that needed to be embedded as well. So how can we extend Drupal 8 core’s ability to embed these pieces of content in a rich-text area?
Enter the Entity Embed module.
The Entity Embed module allows any Drupal entity to be embedded within a text area using a WYSIWYG editor.
The module doesn't care what you embed, as long as that piece of content is stored in Drupal as a standard entity. In other words, you can embed nodes, taxonomy terms, comments, users, profiles, forms, media entities, etc. all in the same way and using a standard workflow.
In order to limit the length of this article, we will be working only with entities provided by Drupal core, but you should definitely try the Media Entity module, which can take your embedding capabilities to a whole new level (more on this at the end of this article).
Basic installation and configuration
Create an embed button
After downloading and installing the Entity Embed module and its dependencies, navigate to
Configuration -> Content Authoring -> Text editor embed buttons
or go directly to /admin/config/content/embed and click “Add embed button”
You will see that there is already a button on this page called “Node,” which was automatically created upon installation. For the purposes of the example, we will create another button to embed nodes, but you can obviously use and modify the provided one on your site if you wish.
As an example, we’ll create a button to embed a node into another node, simulating a “Related article” scenario in a news article.
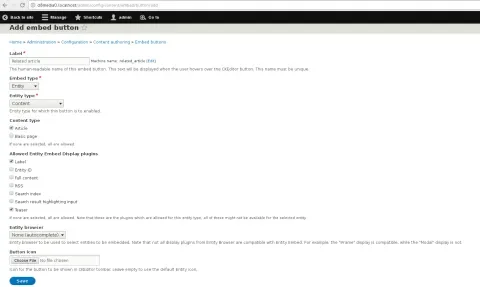
The config options you will find on this page are:
- Label: Give your button a human-readable name and adjust its machine name if needed
- Embed type: If you only have the Entity Embed module enabled, “Entity” is your only option here. When you install other modules that also extend the Embed framework, other options will be available.
- Entity type: Choose here the type of the entity you will be embedding with this button. In our case, we choose “Content” in order to be able to embed nodes.
- Content type: We can optionally filter the entity bundles (aka “Content types” for nodes) that the user will be allowed to choose from. In our case we only want “Articles”.
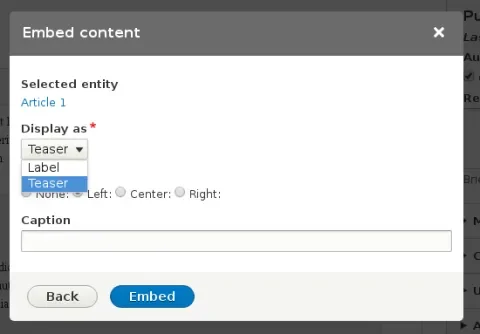
- Allowed Entity Embed Display plugins: Choose here the display plugins that will be available when embedding the entity. This means that when an editor chooses an entity to embed, they will be asked how this entity should be displayed, and the options the user sees will be restricted to the selections you make here. In our case, we only want the editor to be able to choose between a simple “Label” pointing to the content, or a “Teaser” visualization of the node (which uses the
teaserviewmode). More on this later. - Entity browser: In our example, we won’t be using any, but you should definitely try the integration of Entity Embed with Entity Browser, making the selection of the embedded entities much easier!
- Button icon: You can optionally upload a custom icon to be shown on the button. If left empty, the letter “E” will be used.
Once we’ve created our button, it’s time to add it to the WYSIWYG toolbar.
Entity Embed: WYSIWYG configuration
Navigate to:
Configuration -> Content authoring -> Text formats and editors
or go directly to /admin/config/content/formats and click “configure” on the format you want to add the button to. In our example, we are going to add it to the “Basic HTML” text format.
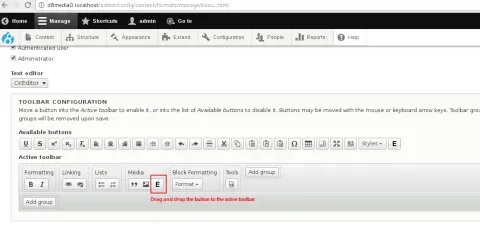
Step 1: Place the button in the active toolbar
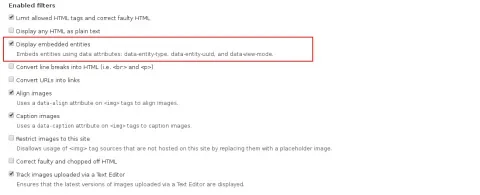
Step 2: Mark the checkbox “Display embedded entities”
Step 3: Make sure the special tags are whitelisted
If you are also using the filter “Limit allowed HTML tags and correct faulty HTML” (which you should), it’s important to make sure that the tags used by this module are allowed by this filter. Scroll down a little bit and verify that the tags:
<drupal-entity data-entity-type data-entity-uuid data-entity-embed-display data-entity-embed-display-settings data-align data-caption data-embed-button>are listed in the “Allowed HTML tags” text area.
If you are using a recent version of the module, this should be automatically populated as soon as you click on “Display embedded entities”, but it doesn’t hurt to verify it was done correctly.
Common pitfall
If you are embedding images and you want to use “Alt” and “Title” attributes, you probably want to fine-tune the allowed tags to be something like:
<drupal-entity data-entity-type data-entity-uuid data-entity-embed-display data-entity-embed-display-settings data-align data-caption data-embed-button alt title>
Instead of the default value provided.
Common pitfall
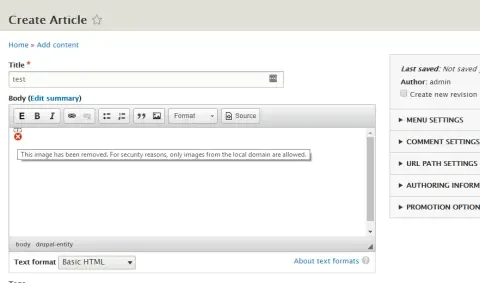
If you have the filter “Restrict images to this site” active (which comes activated by default in Drupal core), you will probably want to reorder the filters so that “Display embedded entities” comes after the filter “Restrict images to this site”. If you don’t do this, when you embed some image entities you may end up with something like:
All set, ready to embed some entities!
Your editors can now navigate to any content form that uses the “Basic HTML” text format and start using the button!
Common pitfall
After this issue got in, the module slightly changed the way it manages the display plugins for viewing the embedded entity. As a result, the entity_reference formatter (“Rendered entity”) that many people are used to from other contexts is not available right away, and instead all non-default viewmodes of the entity type are shown directly as display options.
However, for an entity without custom viewmodes, you won’t have the “Full” (or “default”) viewmode available anymore. There is still some discussion happening about how to ensure the best user experience for this issue, if you want to know more about it or jump in and help, you can find more information here, here and here.
Quick and easy solution for remote embedding with URL Embed
A sister-module of Entity Embed, the URL Embed module allows content editors to quickly embed any piece of remote content that implements the oEmbed protocol.
Nice tech terms, but in practice what does that mean? It means that any content from one of the sites below (but not limited to these) can be embedded:
- Deviantart
- Flickr
- Hulu
- IFTTT
- National Film Board of Canada
- Noembed
- Podbean
- Revision3
- Scribd
- SlideShare
- SmugMug
- SoundCloud
- Spotify
- TED
- Ustream
- Viddler
- Vimeo
- YouTube
Under the hood, the module leverages the awesome Embed open-source library to fetch the content from the remote sites, and uses the same base framework as Entity Embed to create embed buttons for this type of content. As a result, the site builder has a very similar workflow when configuring the WYSIWYG tools, which can then be used by the content editor in a very intuitive way. Let’s see how all that works.
Install the module and create a URL Embed button
As usual, the first step is to enable the module itself, along with all its dependencies.
Common pitfall
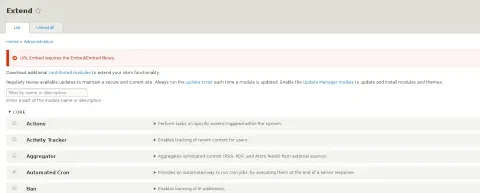
This module depends on the external Embed library. If you are using Composer to download the Drupal module (which you should), Composer will do all the necessary work to fetch the dependencies for you. You can also install only the library itself using Composer if you want. To do that just run "composer require embed/embed". Failing to correctly install the library will prevent the module from being enabled, with an error message such as:
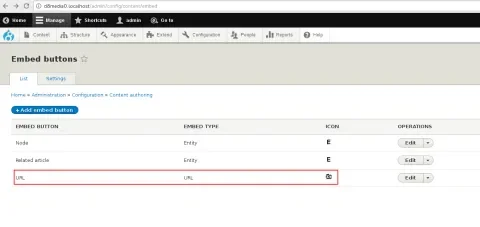
Once successfully enabled, the “Embed button” concept here is exactly the same as in the previous example, so all we need is to go back to /admin/config/content/embed .
The module already creates a new button for us, intended for embedding remote content. URL buttons have no specific configuration except for name, type and icon, so we’ll skip the button configuration part.
URL Embed: WYSIWYG Configuration
Similarly to what we did with the Entity button, we need to follow the same steps here to enable the URL Embed button on a given text format:
- Step 1: Place the button in the active toolbar
- Step 2: Mark the checkbox “Display embedded URLs”
- Step 3: Make sure the special tags are whitelisted. (Note that here the tags won’t be automatically populated, you need to manually introduce
<drupal-url data-*>to the “Allowed HTML tags” text area.) - Step 4: (Optional) If you want, you can also mark the checkbox “Convert URLs to URL embeds”, which will automatically convert URLs from the text into embedded objects. If you do this though, make sure you reorder the filters so that “Display embedded URLs” is placed after the filter “Convert URLs to URL embeds”
All done, go embed some remote content!
Common pitfall
Please bear in mind that while the Embed library can deal with many remote websites, it won’t do magic with providers that don’t implement the oEmbed protocol in a consistent way! Currently the module will only render the content of providers that return something inside the code property. If you are trying to embed some remote content that is not appearing correctly on your site, you can troubleshoot it by going to the URL: https://oscarotero.com/embed3/demo and trying the same URL there. If there is no content inside the code property, this URL unfortunately can’t be embedded in Drupal using URL Embed. Once this issue is complete, this will be less of an issue because the validation will prevent the user from entering an invalid URL.
Get even more by integrating with other Media solutions
There are at least two important ways you can extend the solutions indicated here, to achieve an even more powerful or easy-to-use editorial experience. Those approaches will be discussed in detail in upcoming articles, but you can have a brief idea about them below, in case you want to start learning about them right away.
Allow content to be selected through Entity Browsers
In the previous example, the content being embedded (in this case a referenced node) was selected by the editor using an autocomplete field. This is a very basic solution, available out-of-the-box for any referenced entity in Drupal core, but it does not provide the ultimate user experience we would expect from a modern CMS. The good news: it’s an easy fix. Plug any Entity Browser you may have on your site to any embed button you have created.
Going over the configuration of Entity Browsers is beyond the scope of this article, but you can read more at the official documentation, or directly by giving it a try, using one of the pre-packaged modules like File Entity Browser, Content Browser or Media Entity Browser.
Common pitfall
If you are using an Entity Browser to select the content to be embedded, make sure your browser is configured to have a display plugin of type “iFrame.” The Embed options already appear in a modal window, so selecting an Entity Browser that is configured to be shown in a modal window won’t work.
Use the Media Entity module to deal (also) with remote media assets
The URL Embed module is a handy solution to allow your site editors to embed remote media assets in a quick-and-easy way, but what if:
- you want to standardize your workflow for managing local and remote media assets?
- you want to have a way to re-use content that was already embedded in other pieces of content?
- etc.
A possible alternative that would solve all those needs is to standardize how Drupal sees all your media assets. The Media Entity approach means that you can “wrap” both local and remote media assets in a special “media" entity type, and as a result, the Entity Embed could be used with any type of asset, once all of them are Drupal entities regardless of their real storage.
In Conclusion
Hopefully, you find this a useful tutorial. I can strongly recommend this “Media Entity” approach, because it is being partly moved into Drupal core, which will result in an even stronger foundation for how Drupal sites will handle media assets in the near future.
Acknowledgements
Thanks to Seth Brown, David Burns and Dave Reid for their help with this article.
Other articles in this series
Image credit: Daian Gan

