Tugboat is a SaaS product created by Lullabot that spins up a working website for every single pull request (or branch or however you configure it). The tool has had visual regression testing for most of its life, but from a front-end developer’s point of view, the implementation was clunky at best. The workflow required a developer to log into the Tugboat dashboard and manually enter the path to test. This would work well when looking at one page, but when scouting the entire site for regressions, it becomes tedious. Happily, with the newest version of Tugboat, this workflow is completely revamped.
In this article, we’ll look at the benefits of visual regression testing, and how to set it up and use it within Tugboat.
Why Visual Regression Testing is Important
CSS styles are global. If you make a change in one component’s style, there’s a distinct possibility that the style can break the styling of an unrelated component on a completely separate page. There are tons of CSS architectural methods to deal with this including BEM, CSS modules, utility classes, etc., but there’s no guarantee that a global class won't sneak into a stylesheet or Sass partial where it doesn’t belong. That’s why visual regression testing matters.
Tugboat’s New Visual Regression Workflow
Minutes after a pull request is submitted, Tugboat will post links to the live preview, dashboard, and to the visual diff within GitHub/BitBucket/Gitlab.
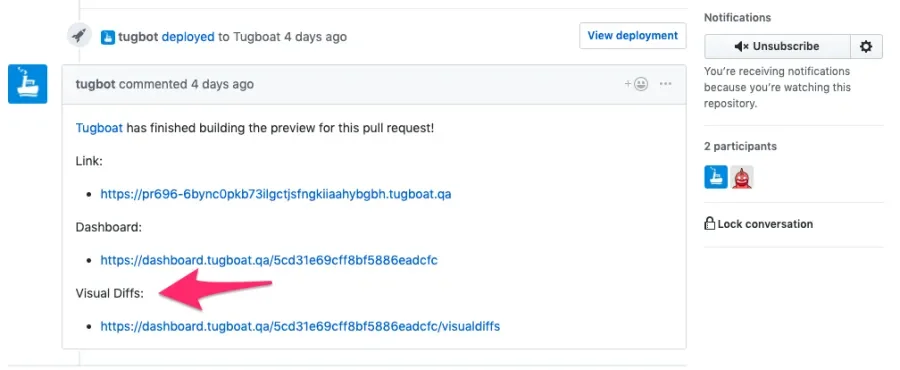
The visual diffs link takes you to the screen depicted below, showing all of the pages in your visual diffs at the configured screen widths (by default these are smartphone, tablet, and desktop).
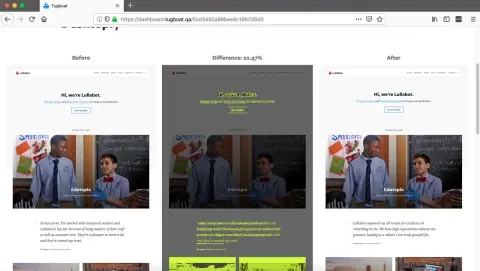
Demonstration of visual regression highlighting a positioning change within the hero text that would otherwise likely slip by.
Here’s the entire workflow from the GitHub issue queue.
You can also get to the visual diffs through the Tugboat dashboard.
Configuring the Visual Diffs
Configuring Tugboat to output the visual diffs is straightforward. Tugboat’s configuration file is located in .tugboat/config.yml. To add visual regression testing, just add the following after the commands section within your default service.
services:
  apache:
    visualdiffs:
      - /
      - /our-work
      - /services
      - /about
      - /articles
      - /podcasts
      - /contact
      - /jobs
      - /terms
      - /how-we-built-site
      - /podcasts/drupal-voices
      - /articles/early-rendering-a-lesson-in-debugging-drupal-8
      - /articles/strategies-for-patch-management
      - /articles/decoupled-drupal-is-it-right-for-your-business
      - /about/betty-tran
This will tell Tugboat to compare the current preview against the base preview for each of the paths listed.
You can also tell Tugboat to handle pages differently including when to take the screenshots.
services:
  apache:
    visualdiffs:
      # Create a visualdiff of the home page using the default options
      - /

      # Create a visualdiff of /blog, but override the default timeout option
      - url: /blog
        timeout: 10

      # Create a visualdiff of /about, but override the default waitUntil option
      - url: /about
        waitUntil: domcontentloaded
For more options, including comparing different paths against each other, see Tugboat’s visual diff documentation.
Conclusion
The new workflow is already implemented on multiple internal Lullabot projects, and has proved itself useful. There’s also a support community on Slack to help you get up and running quickly.
If you’re already using Tugboat, check it out! It’s free and the images do not count against your disk space quota. And, if you’re not yet using Tugboat, you can sign up for the free tier at https://www.tugboatqa.com/.